Thursday, January 19, 2012

Congratulations, Fall, 2011 Challenge Finishers!


Congratulations to the following 13 DPS teachers who have completed the Fall, 2011 DPS Technology Challenge!

  1. Kirsten Edwards
  2. Blaire Byrley
  3. Heather Gee
  4. Toni Keplinger
  5. Belinda Proctor
  6. Stephanie Gillingham
  7. Jill Harrell
  8. Lena Deskins
  9. Veatrice Hawkins
  10. Monique Huston-Taylor
  11. Wanda Cook
  12. Cheryl Schrader
  13. Wendy Davidson


Tuesday, December 13, 2011

Fall Tech Challenge Early Finishers!

So far there are seven finishers of the Fall Edition of the DPS Technology Challenge!  All other participants still have until the new year to complete the five challenges.  It has been extremely fun to read all of your posts, learn a little about each one of you, and see your creative work.  Below are the finishers as of the posting of this article.


Monday, December 12, 2011

Being Creative Using Creative Commons

If you gotten to Challenge #4, you have had a chance to learn a little about Creative Commons (CC) and how their licenses free users from the often obsolete, overly-severe restrictions of traditional copyright.  Challenge #4 has you use Flickr to find CC content, which is a great option.  However, is not your only one.

Creative Common's web site has a search capability that allows users to find content licensed under one of CC's six categories.  For instance, if I want to find a picture of a computer that I want to use for non-commercial purposes, and only want to reuse it as is, I would perform the following search:


I can click on any of the tabs to search with a different service (Google, Flickr, blip.tv, etc.).

Using Flickr's tab, each result will show a small "i" when moused over.  If clicked upon, it will show the CC license for the image among other information.


The icons tell me I can use the image as long give credit ("Attribution") and use it for non-commercial purposes.


If you click on the "Some rights reserved" link, you learn in more detail how you are allowed to use the work:


Now that I know how I am allowed to use the photo, I am ready to move forward.  Say I just want to use it in a blog post.  Above the photo in Flickr is a drop-down menu.  When I click on it I can choose to "Share this on..." "Blogger" or another service.
Since this is a Blogger site, I would choose that option.  However, the "Share this on..." option is really only good if want to write a post about the image.

A better option is to "Grab the HTML/BBCode".


Remember to paste into the "Edit HTML" editor, not the "Compose" editor.

computer monitor

If you want to use a Flickr photo in a Google Docs presentation or some other online presentation service (Animoto, Prezi, etc.), you need a direct link to the image.  This is not intuitive because we would think that URL in the "Grab the link" field is what needs to be copied.  It is not!  

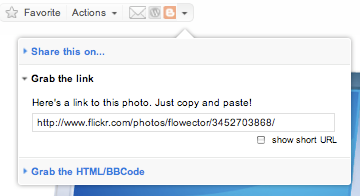
DO NOT USE THIS LINK FOR
ONLINE PRESENTATIONS!
  
Instead choose to "View all sizes" under "Actions".  


Then right-click (or Control-click if you are a Mac user) on the "download..." link and choose to copy the link.


Finally, in your Google Doc (or Animoto, Prezi, whatever) insert an image and paste in the the link.

And voila...


Thanks to Mediajon's work and allowing me to use it in this post!

Thursday, December 1, 2011

The Fine, Endless Print (COPPA and Online Services)

Anyone who has signed up for an online service is familiar with the seemingly-never-ending user agreement that has to be agreed to before receiving access.  For those of us without a law degree, some of the language can be challenging to completely understand, but there are some really important details in those agreements.  Especially for us who teach or have children under thirteen years of age.  Web service providers must comply with a Federal law called the Children's Online Privacy Protection Act (COPPA)COPPA, in short, requires Web service operators to receive "verifiable parental consent" before collecting any personal information from children twelve or under.  Personal information could include items like name, location, school, etc.  Consequently, many mainstream providers (Google, Facebook...) deny access to users under thirteen because they cannot or don't want to go through the hassle of obtaining the "verifiable parental consent" that COPPA requires. 

If you teach children effected by COPPA, how do you comply with the law and still use some of the wonderful services on the Web to teach and learn?  Here is my advice:
  1. Be mindful of  COPPA each time you want to use a service with your students. 
  2. Only use a service with your twelve and under students if they do not have to create accounts, or if they can create accounts with parental permission and you have collected the permission, or if the school district assumes the responsibility for complying with COPPA.
Here are a few examples:
docs.google.com
You can create a Google Docs document (text, spreadsheet, etc.) and publish it on the Web, allowing anyone with a link to edit it.  Thus, your students do not need an account, are not providing Google with any personal information, and are complying with COPPA.  Obviously, it is still important to talk to your students about what information is appropriate and safe to put in the Web. 


edmodo.com
Many sites like Edmodo, which are intended for the K-12 environment, allow access to users under thirteen as long as the teacher or school collects parental permission.  If you use a service like Edmodo, make sure you collect parental permission.  An efficient way to do this is by listing all the COPPA compliant sites you want to use in your class during the year in one permission form.  Tell your parents explicitly what the site is, its rules, and what you expect your students to be doing on the site.

google.com/a/edu

Although users must be at least thirteen to sign up for a Google account, many districts, like Durham Public Schools, are piloting and implementing Google Apps for Education.  The district agrees to comply with COPPA by collecting, maybe with your help, the needed permission slips. 

Tuesday, November 22, 2011

Put Learning on the Map

My wife, Anna, and I spent a few days of our honeymoon in London last summer.  On the long flight across the Atlantic I read a book called The Ghost Map by Steven Johnson.  The book is the true story of London's great cholera outbreak in the mid-1850's and the quest to find its source and resolution.

As Anna and I explored the streets of London, I recognized some of the neighborhoods referred to in the book.  It made the history I learned in the book come alive and feel more real. 

Although we cannot transport ourselves or our students everywhere we read about in our studies, we can explore those places virtually.  Anyone can create customized, annotated maps using Google Maps' My Maps.


For example, Mr. Daniel Miller at Jordan High School created a My Map for his students documenting the London sites of Charles Dickens' Great Expectations.  Check it out below (click on the blue placeholders for details and zoom in and out)!


View Great Expectations - Settings in a larger map

How can Google's My Maps be used in your classroom?

Monday, November 14, 2011

Wikis- Teaching Skepticism

Wiki is a Hawaiian word meaning, according to Dictionary.com, quick.  There is an interesting Wikipedia article about the origins of the wiki web application created by Ward Cunningham in the mid-1990s.  Cunningham's simple idea of allowing users to collaborate online has mushroomed and is a major component of today's Internet.  Users now expect the ability to create knowledge, not just be consumers of it.  On the other hand, sites like Wikipedia create an enormous amount of controversy.  Many disregard Wikipedia as a database of inaccurate information.  Others see it as the democratizing of knowledge.  Take a look at the trailer of the documentary, Truth in Numbers? Everything, According to Wikipedia.  In just a couple of minutes you get a glimpse of both sides of the argument.


So, how as educators should we deal with Wikipedia?  When students do research on the Internet, a Wikipedia link is often one of the first search results when Googled, no matter the topic.  Many students will click on the Wikipedia link and take the information in its article to be fact, no questions asked.  Depending on the article, it could very well be.  However, it could just as well be opposite.

The problem is not Wikipedia, however.  To me, the problem is the lack of skepticism.  And this is not just a problem in the K-12 student population.  Many of us are guilty of it. 

Gone are the days that we can assume that any information from any source is definitively true unless we can verify it.  You can argue that there was never a time when the consumer could assume that any source provided absolutely true information without verification.  When I was student in K-12, I cannot remember my teachers teaching me to be skeptical of fact givers- textbooks, encyclopedias, nightly news, etc., but they should have been.  What I like about Wikipedia is that it forces teachers to teach their students to be skeptical.  I hope that skepticism transcends sites like Wikipedia and students find it when using any source.

So how do you start a lesson in skepticism?  Use Wikipedia, ground zero for supposed inaccurate information.  Whatever you are studying your classes, find out what Wikipedia has to report on it.  Have your students fact check the articles in Wikipedia.  Cross-reference the sources cited in its articles.  Where there are inaccuracies and missing information, have the students edit the article.  It is incredibly easy and incredibly empowering!  And then take that skepticism and empowerment and verfiy other sources of information- the omnipotent textbook, encyclopedia, nightly news, etc.  Have students create their own textbook by creating a wiki with PBWorks.com (click here for our EZ Guide) or Wikispaces.com.

Friday, November 4, 2011

Google Forms and Automatic Responses

Say you have a Google Form.  And say you want someone (you, him, her, someone else) to get an email with the submissions automatically when the form is submitted.  Would that be nice?  To me it would.  And fortunately, it can be done!  Here is one way to do it.

1.  Create your form like always.  Make sure to add a field for an email address if you want to send an automatic reply to the submitter.

2.  Go to your docs and open the spreadsheet of the form.


3. Open another window or tab in your web browser and go to http://sites.google.com/site/formemailer/updates for the Google Script for Form eMailer by Henrique Abreu.  Open the newest .js file (version 3.5 as of this post) and copy all the text.  Or you can download and copy the text from the version here

4.  Back to the spreadsheet, open up the Script editor... under the Tools menu.

 5.  Click on Untitled Project at the top of the page and rename it Form eMailer.  Click OK.
6.   Erase all the text in the code body and paste in the text you copied in step #3.  Click the Save button.


 7.  Click on the myFunction drop-down, choose onInstall, and click on the Run button (looks like a play button).  You will be asked to autorize the use of the script.  Click Authorize.

8.  Click on the myFunction drop-down again and choose install and then click the run button again.


9.  If you are still in the Scipts editor, go to Triggers > Current script's triggers...


10.  Add two new triggers as follows and save it.
11. Return to the spreadsheet. You should see a new worksheet titled FormEmailer and new menu titled the same. (Note that the running automatically cell may read "no" for a little bit.  It will turn to a "yes" once processed fully.
 12. Now, go to the FormEmailer menu at the top of the page and click Settings.  You will see an email editor.  Here is where you will create the email that will be automatically sent when someone submits a form.
  • Use the Insert placeholder link to have the information submitted in that field in the spreadsheet (from the form) inserted into the email (either in the To: line, Sender name: line, or Subject: line).
  • Type your email like you would want the submitter to see it once received.  
  • Use basic HTML code to make text bold <b>, text go to the next line (line break) <br>, or skip a line (paragraph break) <p>. 

13.  Save and Close and you are ready to send out via email or post online!

Some ideas for use:
  • Principals love this tool for observing teachers and sending them instant observation data.
  • I love to use this tool to confirm that I received a form submission in regards to the Technology Challenge, the DPS Technology Showcase, and workshop evaluations.
How could you use it?